Wednesday, April 22, 2009

The Camera Bag that could have been...


I have been looking for a new camera bag for a while, one that is for just the camera not all it's stuff. I've seen a few different models but figured I could try making one of the pouch style.


I really like the colors and print of this fabric and could see myself carrying a bag in this fabric around. But...


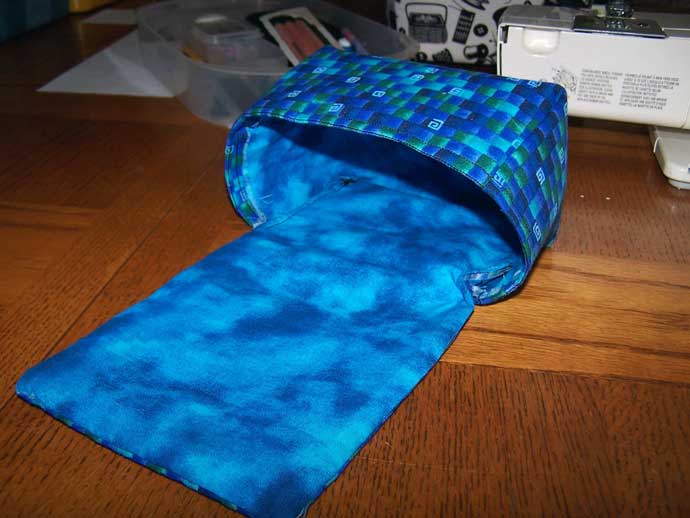
I just didn't like it as a camera bag, I really need something more sturdy, probably waterproof and with a strap long enough to carry from the shoulder which mine is not.

Too bad I only have the one camera so you can't see it in the bag. For just running around locally taking pics it would be great I'd just find it cumbersome.


Thursday, April 9, 2009

Polymer Clay Box and a New Technique

So I've seen several examples of polymer clay boxes over the years, but I've never gotten around to trying one. Lately I've been seeing several blog posts on the backfilling technique, it's really not very hard to do but getting the really good results seems to allude me.


I used a dollar store cardboard box as my base/form. It eventually disintegrated during the sanding process. Next time I'll try a metal form so it can be reused.


The base is a layer of black Fimo Soft covered with a textured sheet of black. I then filled the impressions with a strip of gray and a strip of white. I was trying for a graduated look that I didn't quite pull off. I do believe I may have been too ambitious in using this texture for a first try, it was very detailed and I did not do as good a job applying it as I needed to. During the sanding process to remove the unwanted white and gray areas it became obvious that the backfilling clay and background clay did not adhere to each other very well a layer of liquid pc may help that with the more detailed designs.


The lid of the box was made from a cane of 2 skinner blend logs, cut and reformed into a square of 3x3. I just cut thin slices of the cane and arranged them on a layer of gray backing, that was then applied to a sheet of black.

Thursday, April 2, 2009

The Making of Oatmeal Soap

Oatmeal Melt and Pour Soap
We live in what I call a desert climate, the humidity hardly gets above 50% and my skin stays dry and itchy without lotion. So in reading about soap properties I found that oatmeal added to soap helps with moisture and the roughness of it helps with exfoliation. I was skeptical about both claims but it does seem to make the skin softer and smoother even if I'm not sure if it's the oatmeal properties or the exfoliation that does it.

I was making a big batch so I started with 1 lb white melt and pour soap and 1 lb clear.

Clear and White Melt and Pour Soap cut into small cubesI melted those down starting with smaller batches in the microwave and adding them to a large double boiler.

Regular oatmeal ground in the food proccessorI put roughly a whole cup (it was the end of the container) of regular Quaker oatmeal into my mini food processor and ground it up just about as fine as it would go. I wanted to leave a little texture to it.

After my soap was melted I added the oatmeal and stirred it in well, I filled 5 molds with the 2 lbs of soap. My molds were drawer dividers I found at wallyworld.

Precut oatmeal soap logsThe next afternoon I unmolded the loaves and cut them into generous sized bars. I left them cure for another day and they are ready to go.